In the years that I’ve worked on Jimdo’s Support Team, one of the most frequently asked questions that I see come across our help desk is “how can I get more visitors to my site?” It’s a question everyone has to tackle when they first start, and that’s why I’ve written this guide to help get some visitors to your site in a relatively short amount of time.
1. Start with some basic content
Having a website with a cool design won’t do you any good if it doesn’t have any information on it. Before venturing out into the world of SEO, site maps, and website widgets, it’s a good idea to set the foundation for your project by adding some basic website content. You’d be surprised how many people skip this really important step—but why would someone visit a website with nothing on it?
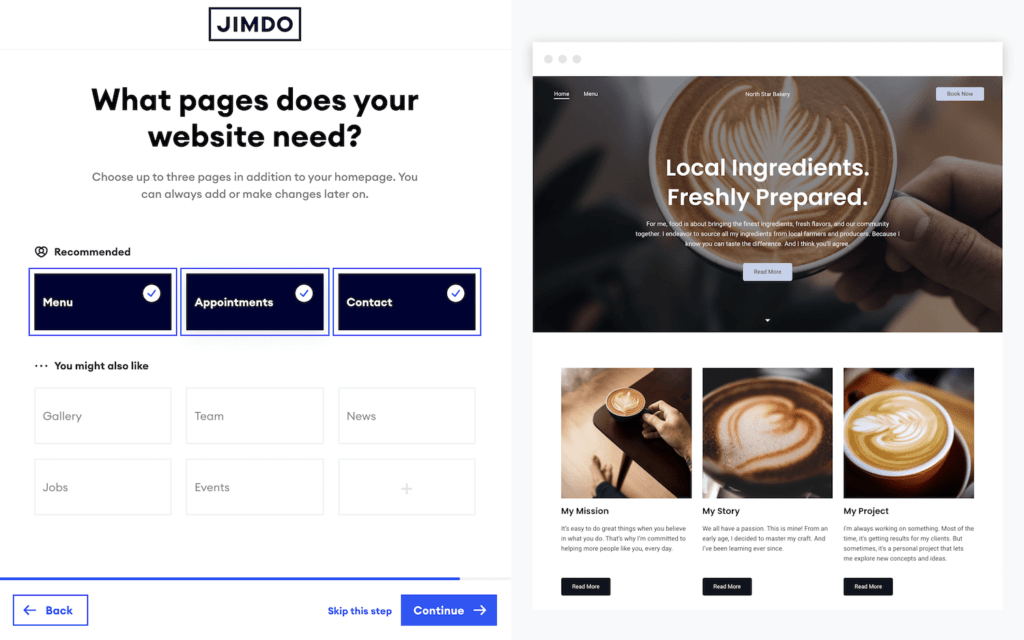
To start, treat your homepage like the central hub for your website. It should include important information about your company and its mission statement, and some clear choices on where people should navigate to next. From there, branch out into other pages: an About Page is the place for you to tell your story and show that you’re the real deal; your Services or Store page is where you can start selling your product; an informative Contact Page helps visitors easily get in touch with you. Creating a simple site plan can help you keep track of what you have.
If you don’t want people to see your work-in-progress as you create pages, you can set up an Under Construction page. But if your site is brand new, chances are good that no one will accidentally stumble upon it while you’re building.

2. Set up your domain
Now that you have some content in place, it’s time to set up your domain. If you’re registering one through Jimdo, log into your site and fill out the registration form. Then keep an eye on your email for the confirmation message to finalize the registration. If you already have your own domain, you can use it with your Jimdo site by following this easy domain guide.
Bring your business online with Jimdo.
3. Fill out your SEO settings
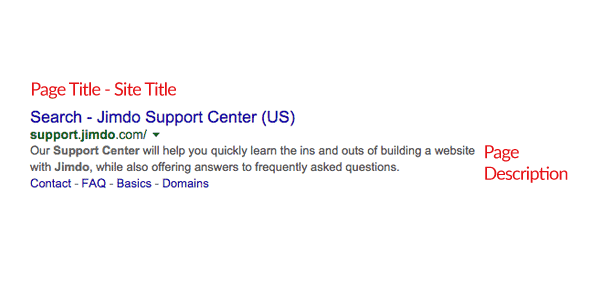
Now you’re ready to start filling out the SEO settings for your website. These behind-the-scenes settings send a message to search engines and tell them more about what’s on each page. They’ll also dictate how your pages appear in search results.
Start by adding your Site Title. The Site Title is text that appears on the browser’s tabs that has a bit of information about your site. This will appear on all pages, and should be used for something basic like your company’s name. You’ll also have a chance to choose some relevant keywords to describe your site.

4. Tell Google to index your site
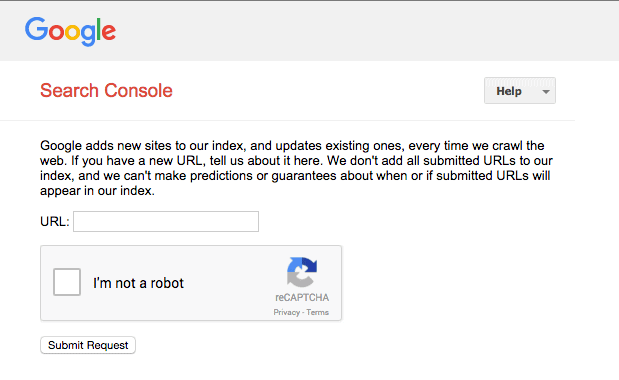
Now that your website has a domain, some basic content, and your SEO settings filled out, it’s time to let search engines know you’re up and running. Normally, new sites can take weeks or even months to show up on Google. You can speed up this process by submitting your URL via this link: https://www.google.com/webmasters/tools/submit-url
You only need to do it once, so there is no need to keep entering your site into this page (tempting though it may be!) Check out this our SEO Basics for more on how indexing and search crawlers work.

5. Sign up for Google Search Console and submit your sitemap
The next important step is signing up for Google Search Console (formerly known as Google Webmaster Tools) and connecting it with your site. The instructions in our Support Center will walk you through this process.
Once you’ve set up your account, follow these steps in Google’s Help Center to submit your sitemap. Your sitemap tells search engines what pages are on your site, how they are organized, which pages are most important, and how often each page is updated.
After you go through all of these steps (I know, it’s a lot of steps), you should receive a message in your Google Search Console account with an SEO to-do list. I recommend following each of the steps they outline for best results.
And of course, once you’ve signed up for Google Search Console, it’s only natural that you also sign up for Google Analytics so that it can start collecting information about your site’s visitors. By using Google Analytics, you will be able to see statistics on your website, how visitors are finding your site, and what you can do to improve your search rankings.
6. Writing content
This next section focuses on content, which is the meat and potatoes of your site. Try writing more content on your About Page, filling out your product descriptions with more details, or writing an FAQ that will help drive traffic from search engines. All of the content you add gives search engines more information to go on when directing people to your pages, and might help you get a featured snippet on a relevant Google search.
This is one area of your website where there really aren’t any shortcuts. By writing frequent, high-quality content, you will ensure that search engines such as Google find your site and rank it higher on search results. Google loves quality content and ranks it high on results since it “understands” that this is the kind of content that people are searching for. This is the part where SEO also comes in. Use an FAQ page to write answers that are relevant to your industry, and add relevant keywords. If you are a bike shop owner, write posts about how to fix a flat tire. When someone searches for “how to fix a bike tire,” Google will start to show your page among the results.
Once you finish editing your content, adding eye-catching images, and optimizing it for SEO, don’t forget to share the post on your social profiles.
After a few weeks or so, you should start seeing an uptick in visitors. I cannot emphasize how important it is that you analyze these visits, as you will start to notice trends. Use Google Analytics to study the keywords that your visitors are using. If you notice that you get a lot of visits for a certain keyword, keep using that keyword so that you can keep getting more visitors. Additionally, Google Analytics can even find which social site is getting you the most clicks. On my personal site, I found that Tumblr was the best place to share my blog posts too, while Facebook hardly moved the needle. Do not underestimate the power of data—analyze this wealth of information to optimize the way you write your posts.
Bring your business online with Jimdo.
7. Share your site on social media
Your domain is ready and you have some content on your site—you’re now ready to share your creation with the world. There are two ways you can go from here: you can just share the site on your personal social channels (if you’re working on a personal site), or you can create accounts for your website/brand/business. Just be sure that you choose the social media strategy that make the most sense for your business.
By sharing your website on social media, you start spreading the word about your new site, and it helps to get your first customers through the door. This is also a great time to ask your closest friends and family members for feedback or even do some informal user testing.
The virtuous cycle
Write, share, analyze, repeat. The sooner you get used to this cycle, the faster and better you’ll get at it. Content is king in the world of SEO, and following this simple formula will help put your website in front of potential customers. It may not be easy, and it may seem like you’re going nowhere at first but don’t give up! Keep at it constantly and you will reap the rewards.

