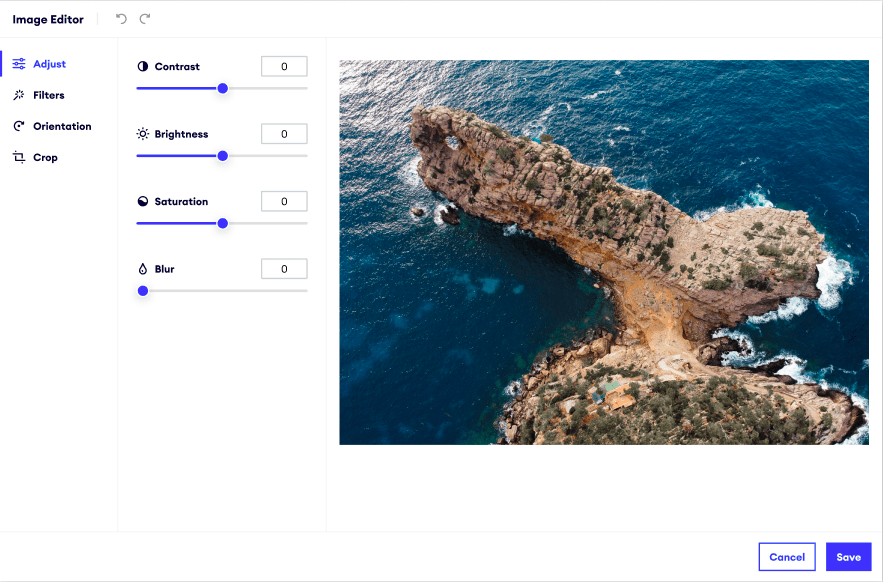
Say goodbye to complex image editing tools! Now you can upload photos straight to your website and perfect them in place. Our new Image Editor makes it easy to customize images so they look professional and fit the style of your business. Edit, crop, enhance…all without leaving your site.
Image editing has been one of our most requested features, so we’re really excited to show you what the new Image Editor can do.

Tip: Select an image on your website. Click the new Edit button. And start transforming the photo right there on the page.
It works perfectly on mobile too. When you take photos on your phone and upload them to your website, you can crop or enhance them at the same time. Great looking pictures and not an app in sight.
Changed your mind? Want to make a small adjustment? There’s no need to re-upload photos or use a different photo editing program. It’s all integrated into your website in the Image Library.
We also love that you can add effects and filters to your photos, a la Instagram (because let’s be honest, it makes us all look like pro photographers). You can also crop images, adjust colors, and lots more. Here’s how.
Photo editing tips
Focus on your subject: Try cropping any unnecessary background space in the image so the emphasis is on your product, a person, or that holiday destination you’re trying to show off. This will make the images on your website look more professional.
Testing, testing: Make sure to check your website images on the main browsers such as Google Chrome, Firefox, and on a mobile device, so you can be sure they look great on all platforms.
Check your image size: If you’re not sure of the pixel size of your image, you can find this on a laptop by right-clicking on the image file, choosing “Properties” and then the “Summary” tab. On a Mac, just right-click the image file, choose “Get Info,” and then click on “More Info.”
Keep the right details in focus
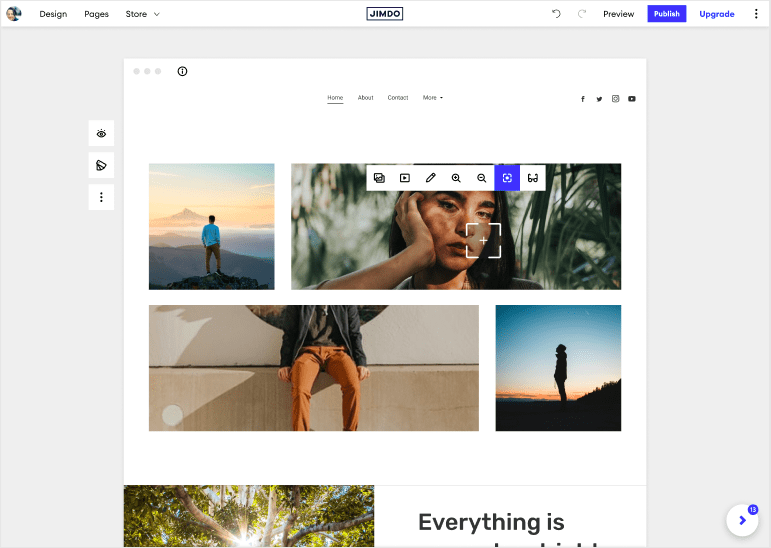
Make sure customers don’t miss the point of your picture—no matter their screen size. Focal Point guides your viewer to the most important part of your image e.g. your product, team, or a special detail in a piece of work you want to show off. Our Focal Point tool helps to align background images too, so things that matter are not hiding behind your content or navigation menu.
Try it: Select the image, then click on the “Set Focal Point” icon shown below to choose which part of the image you want to draw the visitor’s eye to. This works for any image and there’s no need for Photoshop or any extra tools.

But don’t take our word for it—the best way to get to know the new Image Editor is to log in and give it a try.
You already know that professional, high-quality photos are an important part of your website and brand. Now it’s even easier to get the look you want, without needing any special tools or software. For more tips on photos, check out our free resources for beautiful stock photos in the Image Library and our handy guide to optimizing images on your website.

